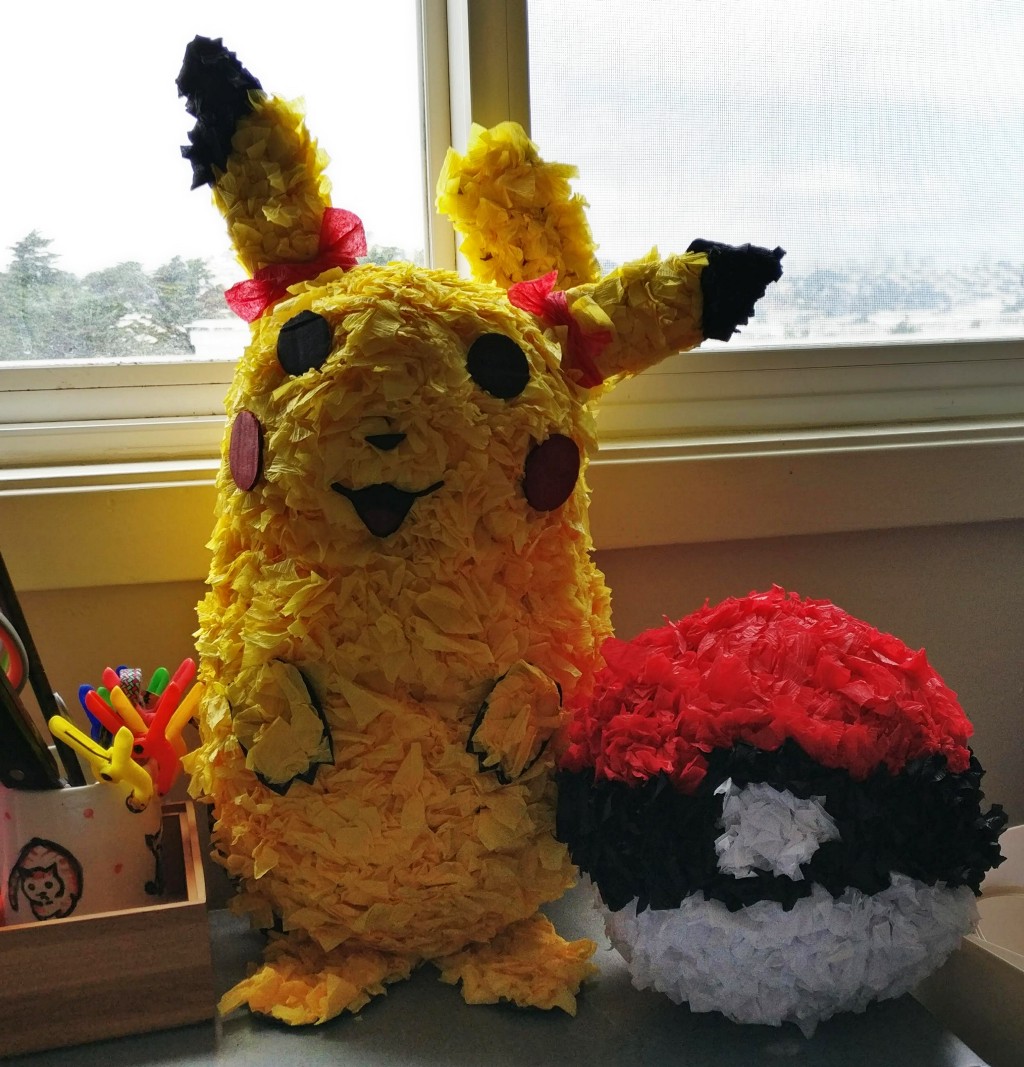
Pokemon Piñata | Project #6
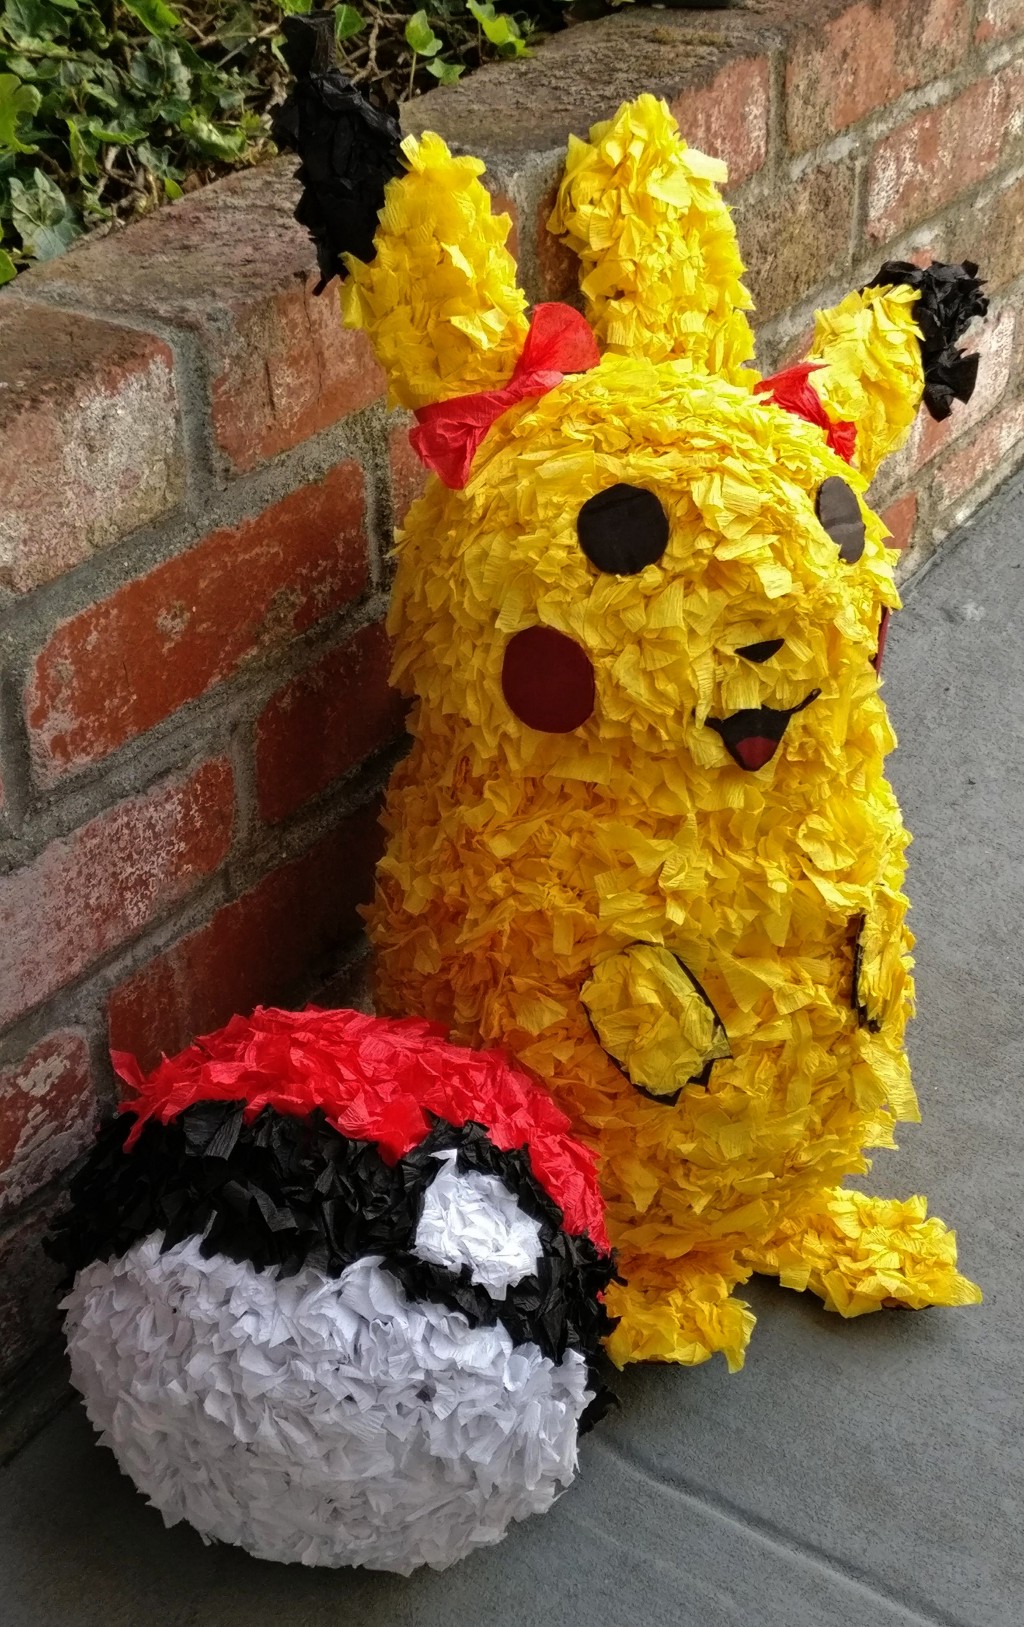
Pikachu and pokeball piñatas made of recycled newspapers, Elmer glue, and tissue papers.
Introduction
I learned how to make piñata from a Mexican mom who volunteered at my Elementary afterschool program. I had so much fun that to this day I still remembered it. My friends and I made a Pikachu piñata before each of us head apart to college. The goal was to break the piñata during our 1st year reunion, but we never did because it was too cute. After that year, everytime I see newspapers, the art side of me wants to start making piñata.
In this blog, I will share with you how I made Pikachu and pokeball piñatas; hopefully it will inspire you to create one of your own as well.
Before and after photos
Materials I used
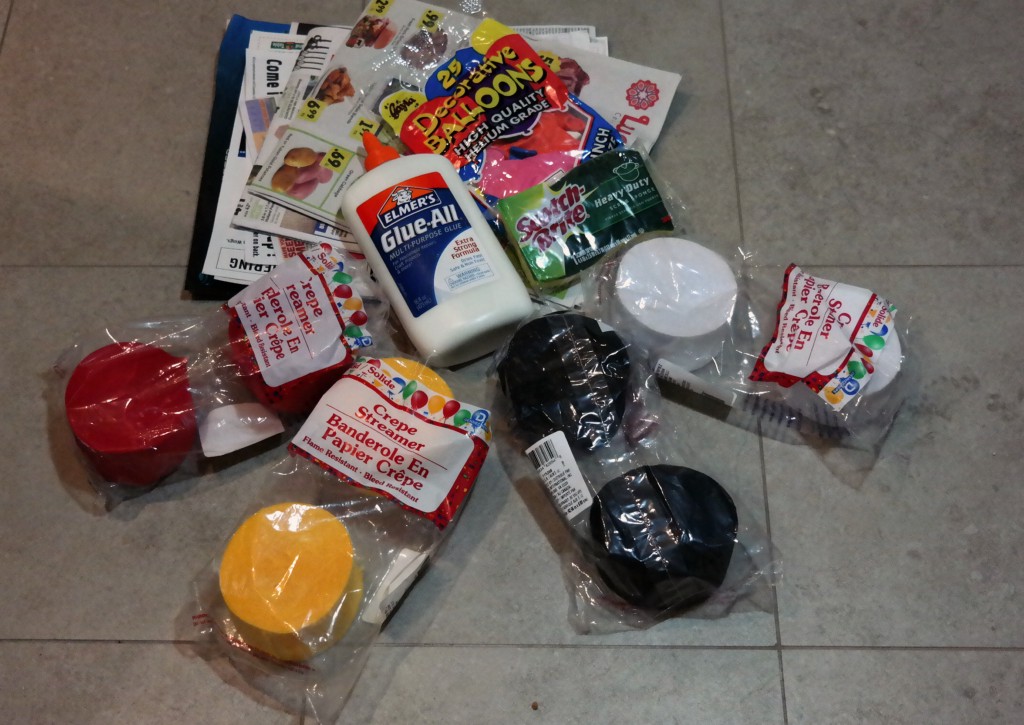
- Pile of newspapers
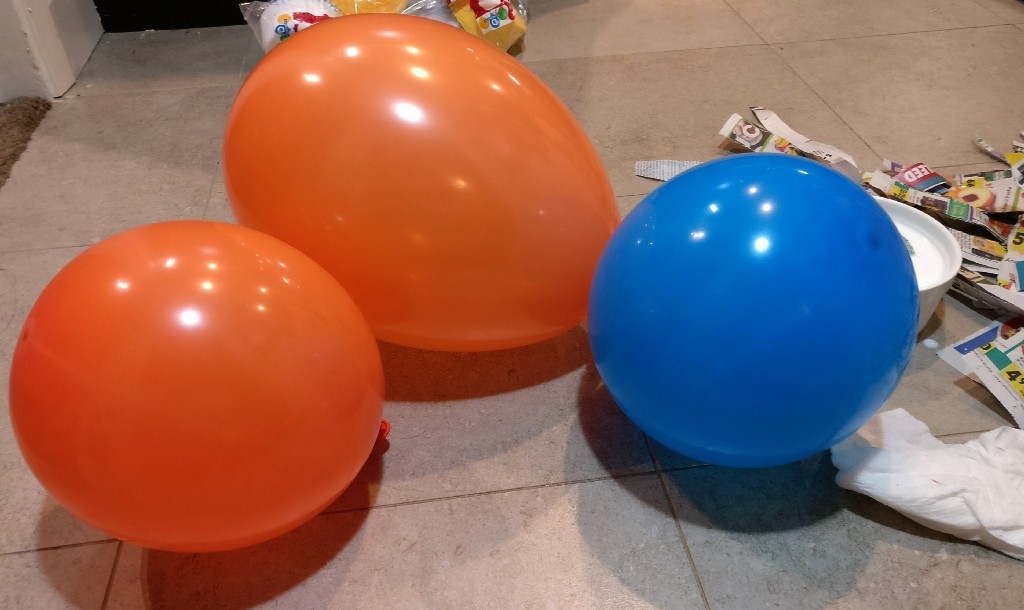
- 3 large balloons
- 1 large bottle of Elmer liquid glue
- 2 rolls of yellow and ½ roll of black crepe papers — for Pikachu
- 1 roll of black, 1 roll of white and 1 roll of red crepe papers — for pokeball
- 1 small cardboard box
- I chopstick or a pen with a flat top
- 1 scissor (a must to cut up the paper)
- A black, red, and yellow sharpie
Note
Either tissue paper or crepe paper will work for this project. I went with crepe paper because I that was what I used as a child.
What is crepe paper?
For years, I thought crepe paper is the same as tissue paper. I came to learn that there are differences between them. They are different in the way how they look and feel and the way how they are made.
Crepe paper is made of similar to how tissue paper is made. The main difference is that crepe paper have a coat of sizing, substances used as a coat on paper to add gloss and/or filler for protective coating.¹ Crepe paper consists of multiple tissue papers glued together and are creased at the grain.² This type of paper is not as smooth as tissue paper and is stretchy; therefore, crepe paper is often to make paper flowers.
Unlike crepe paper, tissue paper is smooth and super thin. Tissue paper is often used to wrap gifts and to decorate gift bags.
Step by Step Instruction
Prepping the ballon
I prepared three balloons. For the Pikachu, I blew one small and one large size balloon. The small balloon was for the head, and the large one was the body. For the pokemon, I blew one medium size balloon. The pokeball size was smaller than the Pikachu head but was big enough for candies. 😉
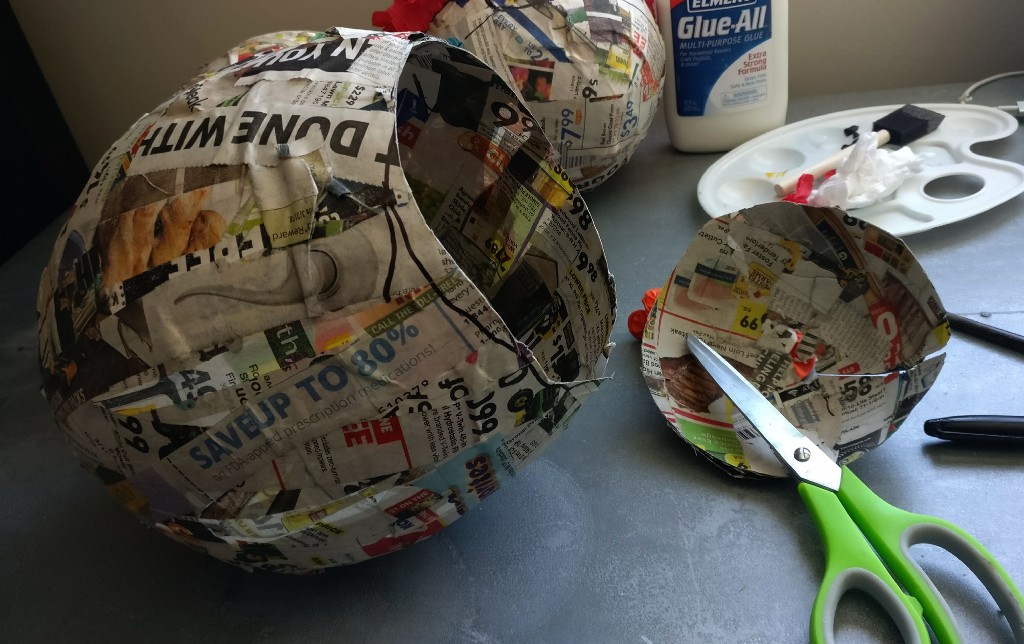
Papier-mâché
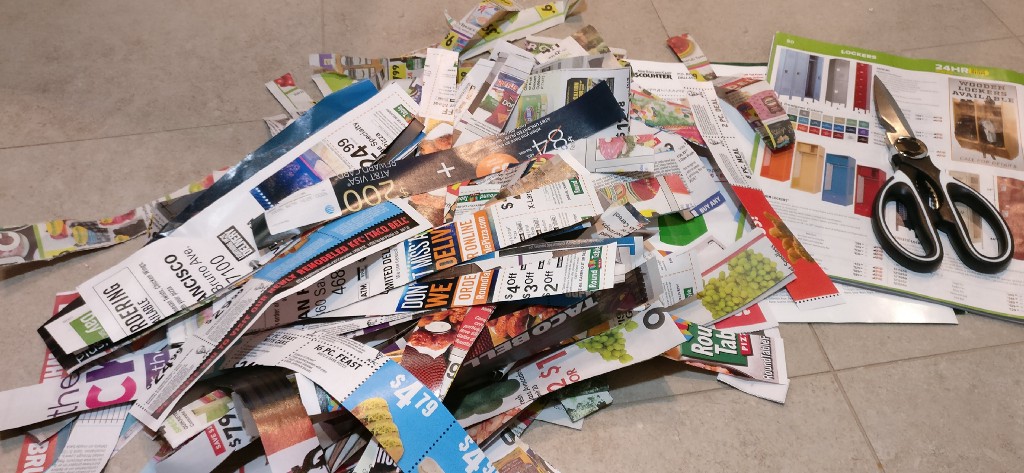
I started out by shredding the newspaper into 1–2 inches wide strips. This task is perfect to get your anger out, haha!
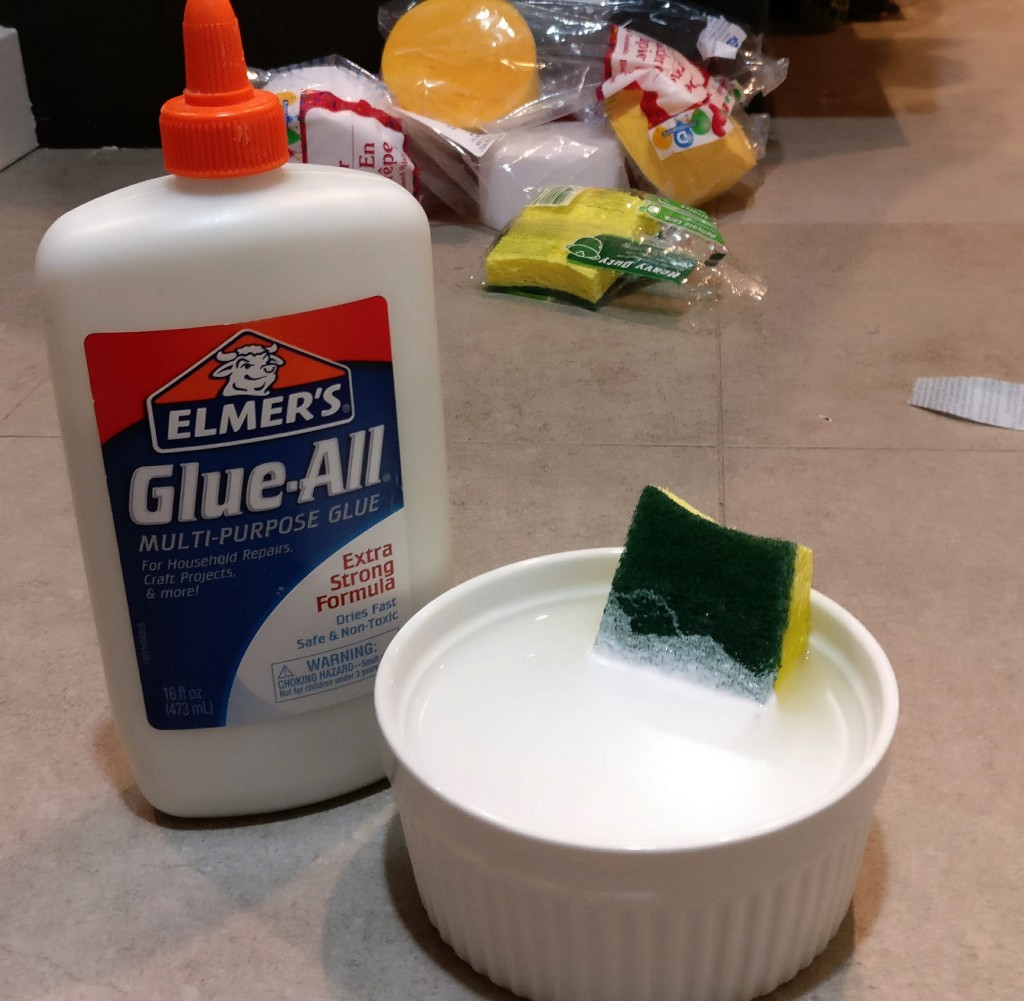
For the glue part, I diluted Elmer glue to 2:1 water to glue ratio. In total, I estimated I used about 1 cup of glue and 2 cup of water. This was the messiest step for this project.
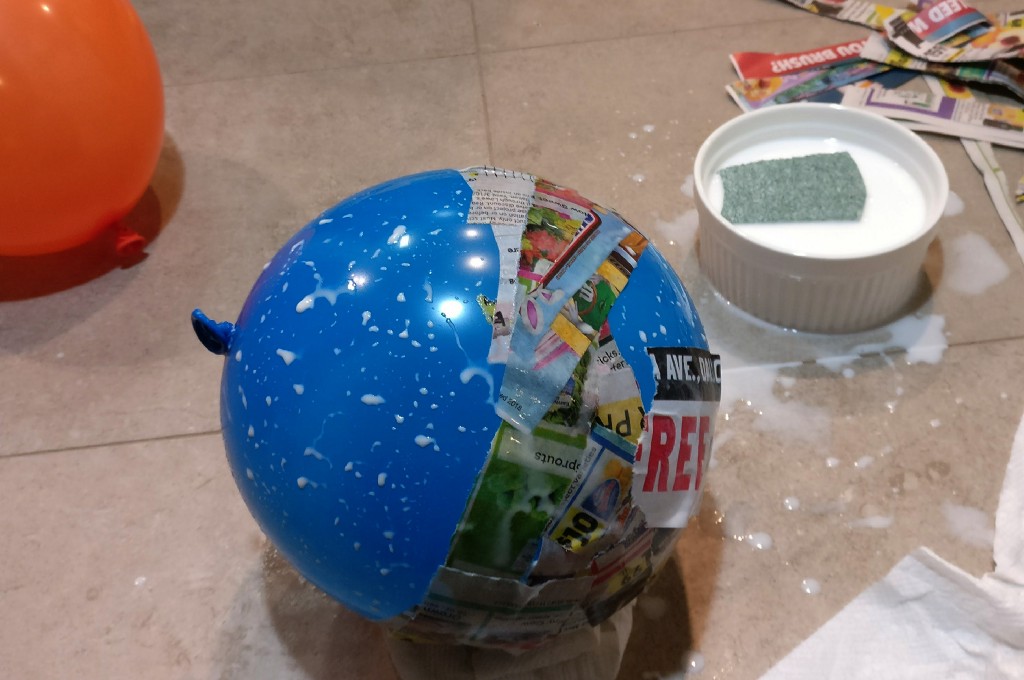
I started covering the balloons with newspapers. I dipped the newspaper strips into the glue mixture one by one, making sure they was fully wet, and placed them onto the balloons. Using my hand, I lightly patted the newspaper onto the balloons. After completing the first layer, I repeated this process until the layer of newspapers was thick enough to the point I can no longer see the balloon skin underneath. The goal was to make this newspaper coating thick enough so that when the balloons pop, the newspapers will hold their shapes.
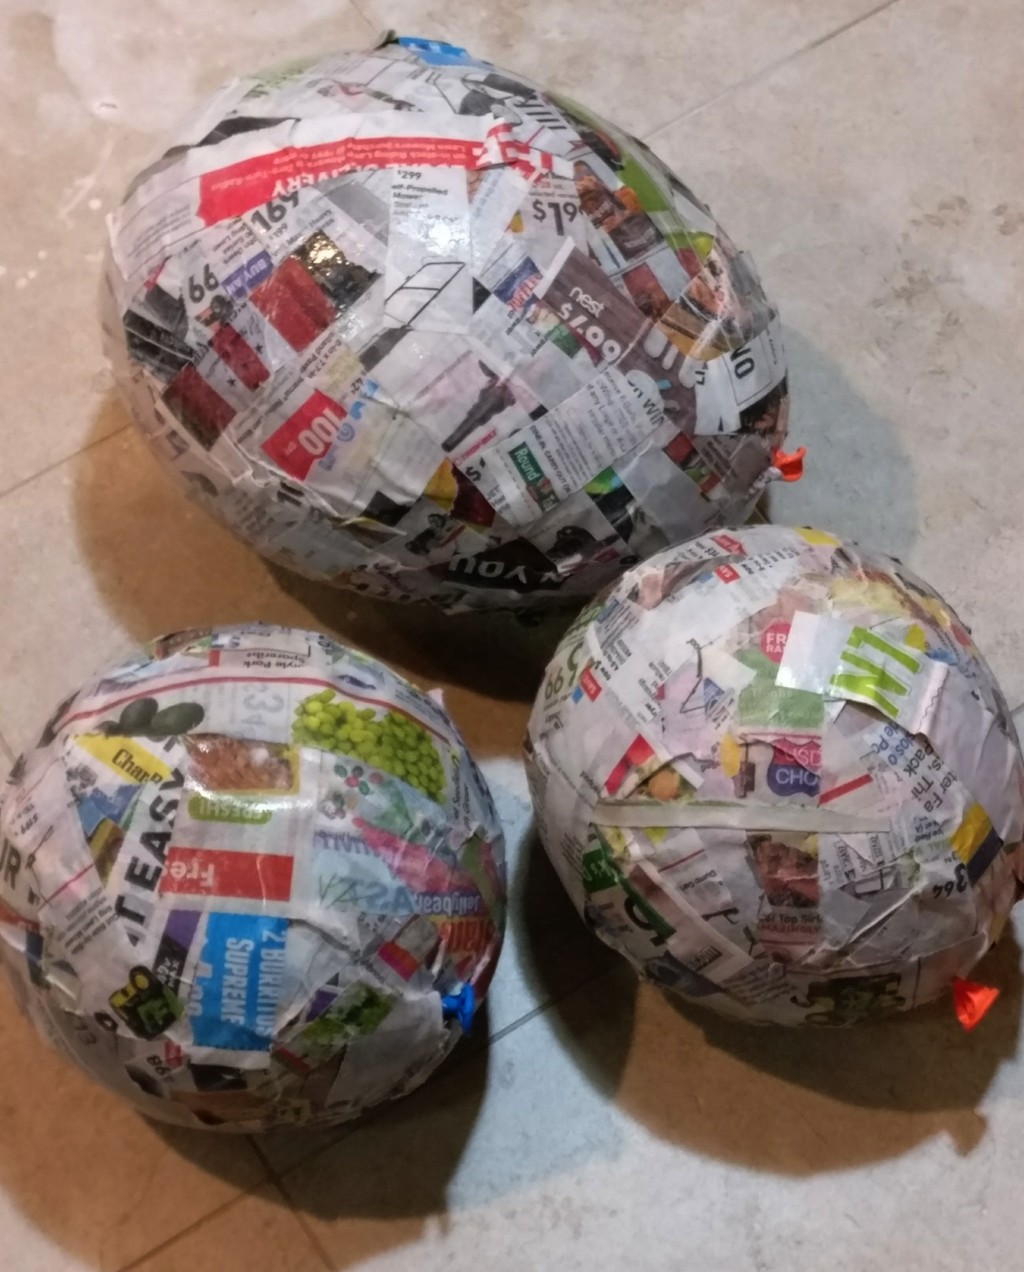
I left the balloons on the counter for a week to dry. Once fully dried, I slitted a hole into the balls with a scissor and removed the balloons.
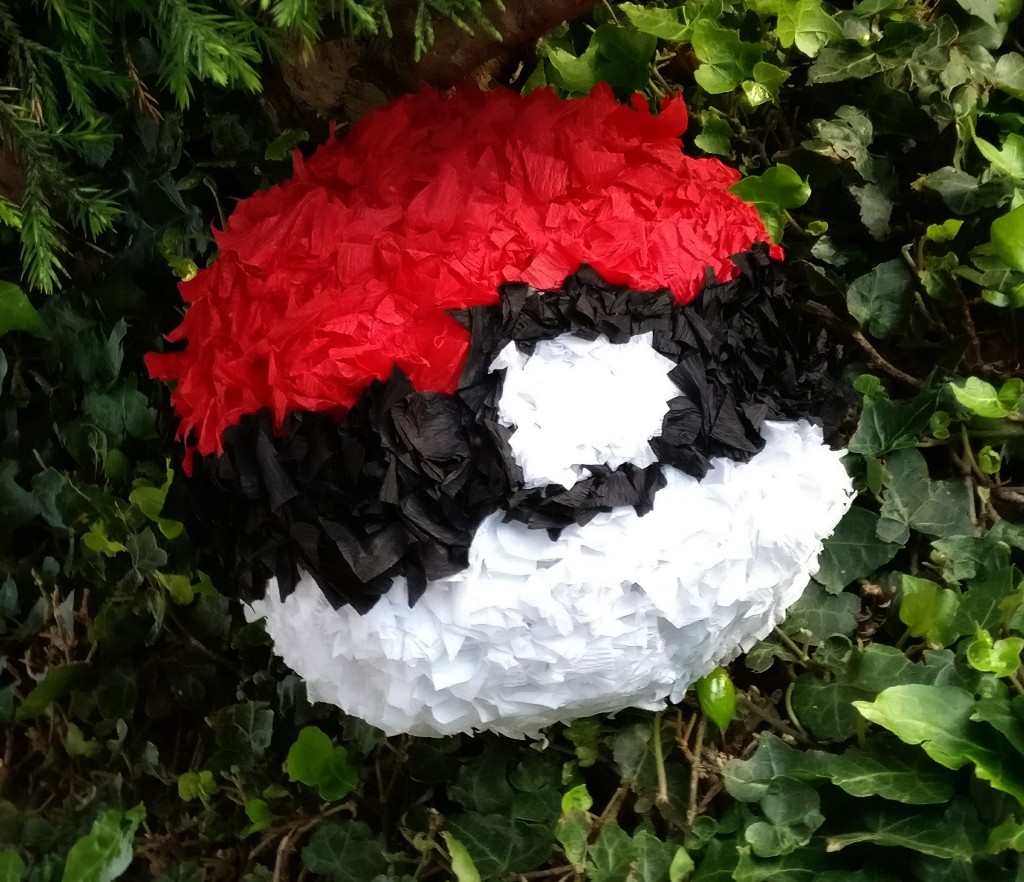
Making the pokeball
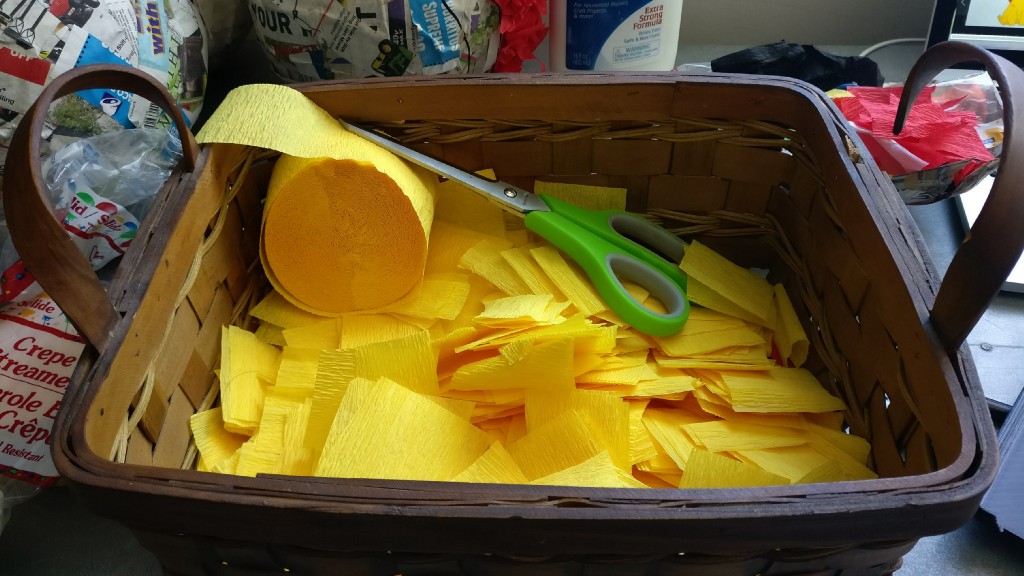
To prep, I cut the black, white, and red crepe paper rolls into tiny squares. They didn’t have to be perfect. I drew out the pokeball outline on the balloon with a sharpie. This made it easier for me to figure out where to put the red, black, and white squares.
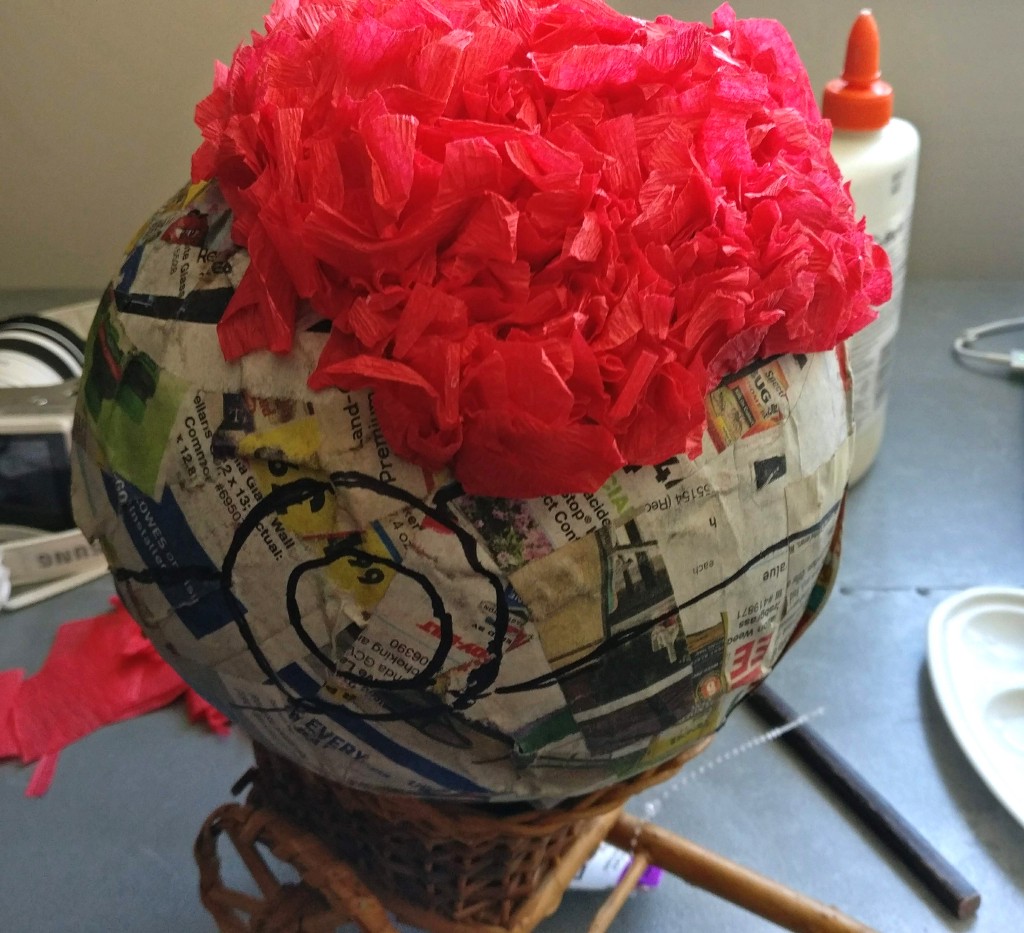
I wrinkled the crepe paper square around the chopstick flat end, dipped it into Elmer glue, and sticked it onto the ball. I repeated this step over and over while drowning myself in korean drama! After a while, I started to spread the glue directly onto the ball instead of dipping the paper into the glue. Before I knew it, the pokeball was completed. I wanted fluffy pokeball, so I placed the squares very close to each other.
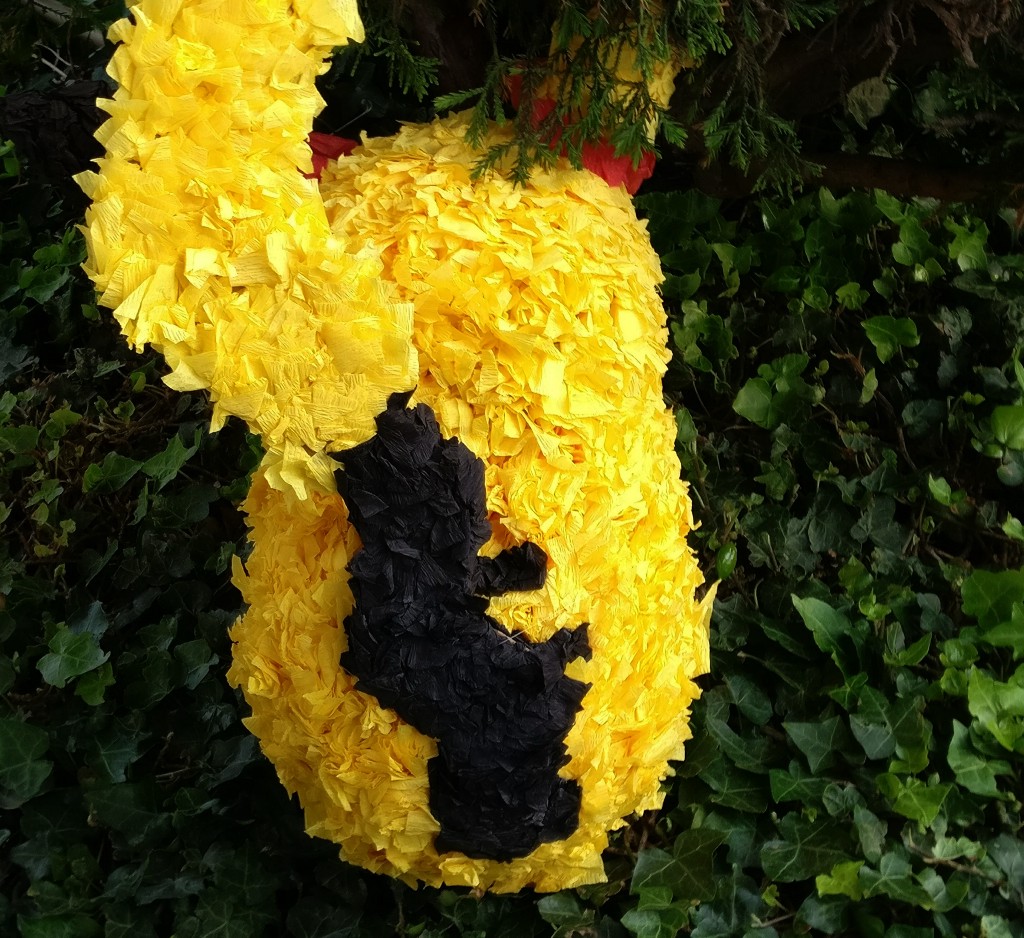
Making the Pikachu Body
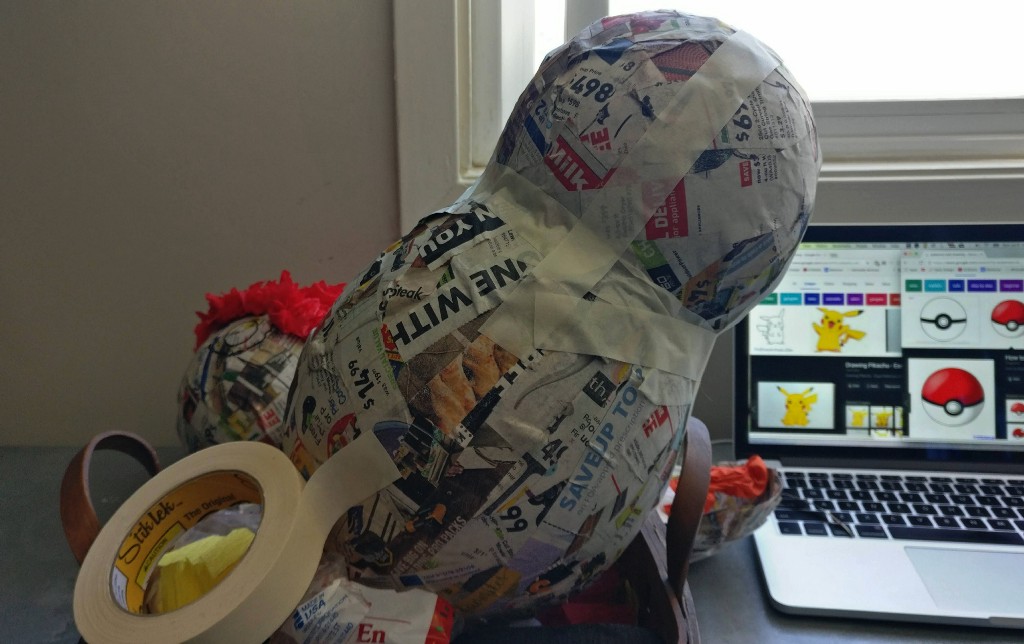
The Pikachu was a little more challenging to make. I struggled at first figuring out how to attach the small balloon to the large balloon. I tried gluing them together with glue, but the small balloon was too rounded it looks so funny. It looked like I took two balls of different sizes and attaching them together by their pointing ends. I decided to cut into the big balloon less rounded end. I cutted just big enough for the small balloon can comfortably sit inside the big balloon. To secure them in place, I ran masking tape from the top of the small balloon to the bottom of the big balloon. Doesn’t it looks like BB-8?
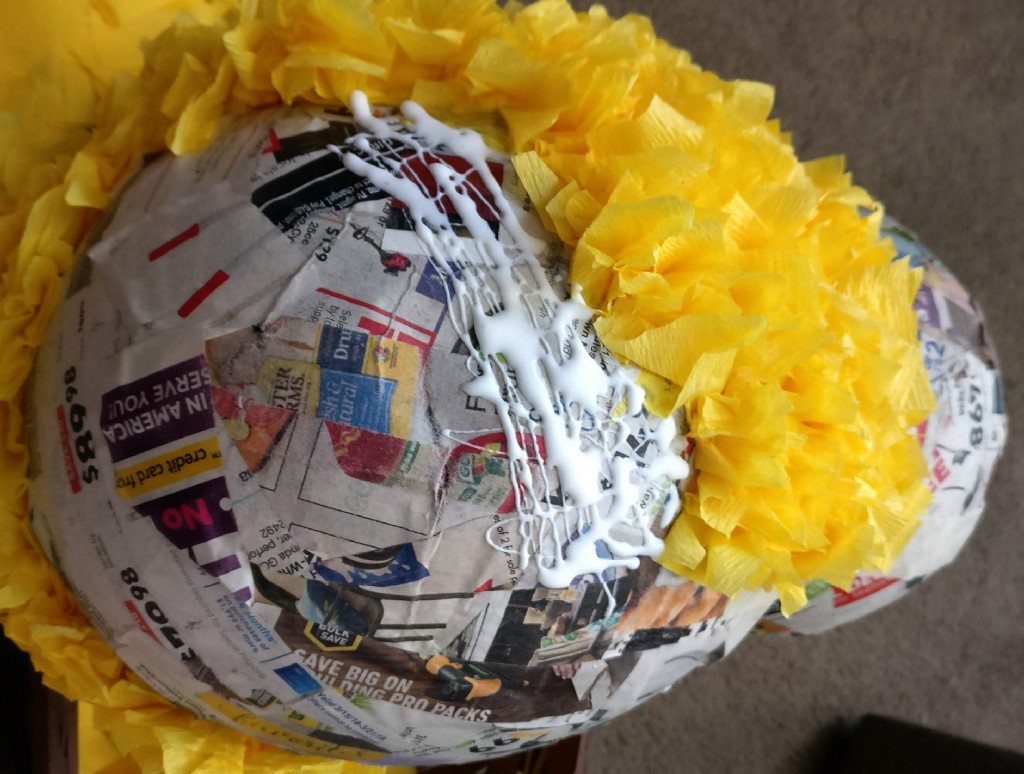
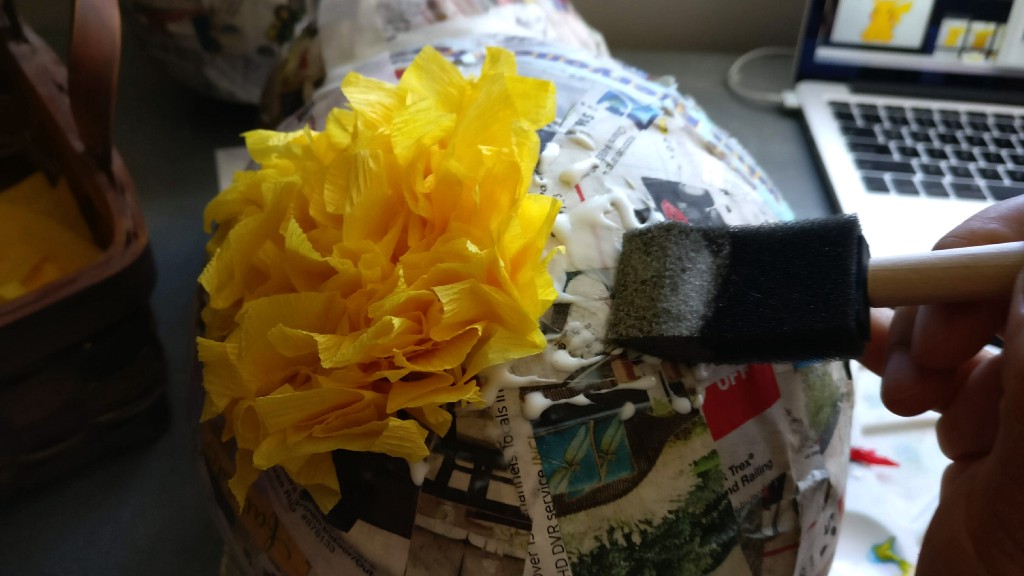
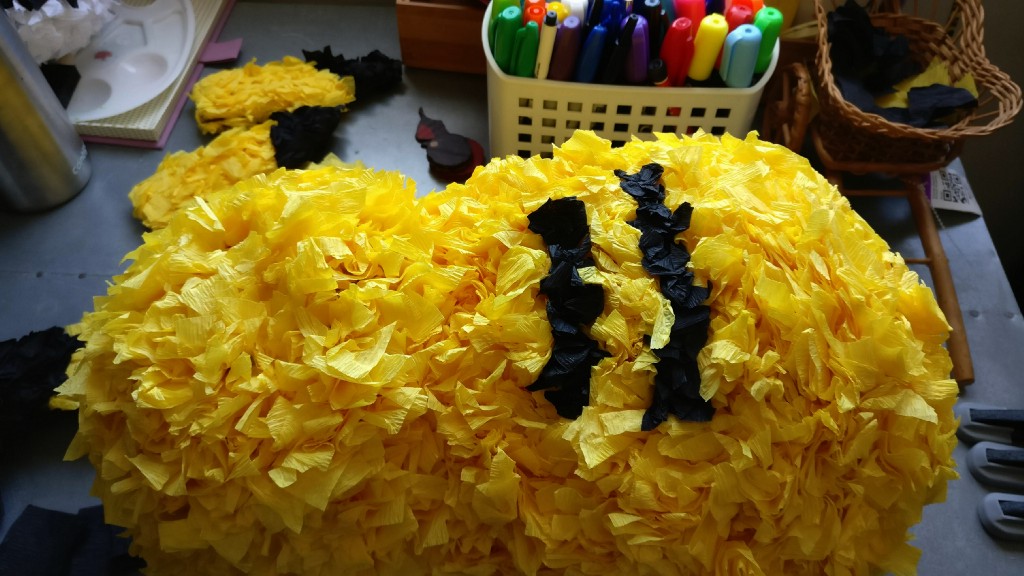
Afterward, I started sticking on the cut out yellow crepe paper squares using the same technique I used to make the pokeball. This part took forever. I also got really greedy and wanted the Pikachu super fluffy (so I can hug it), which was probably why this process took forever.
Making Pikachu ears, tails, eyes, nose, and mouth
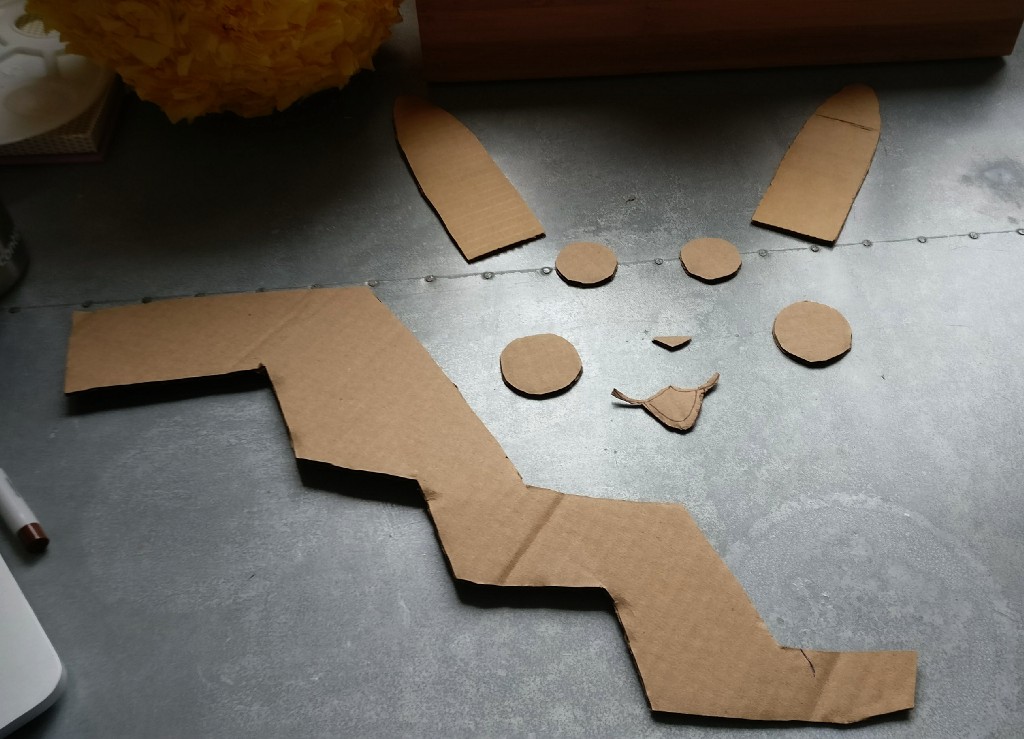

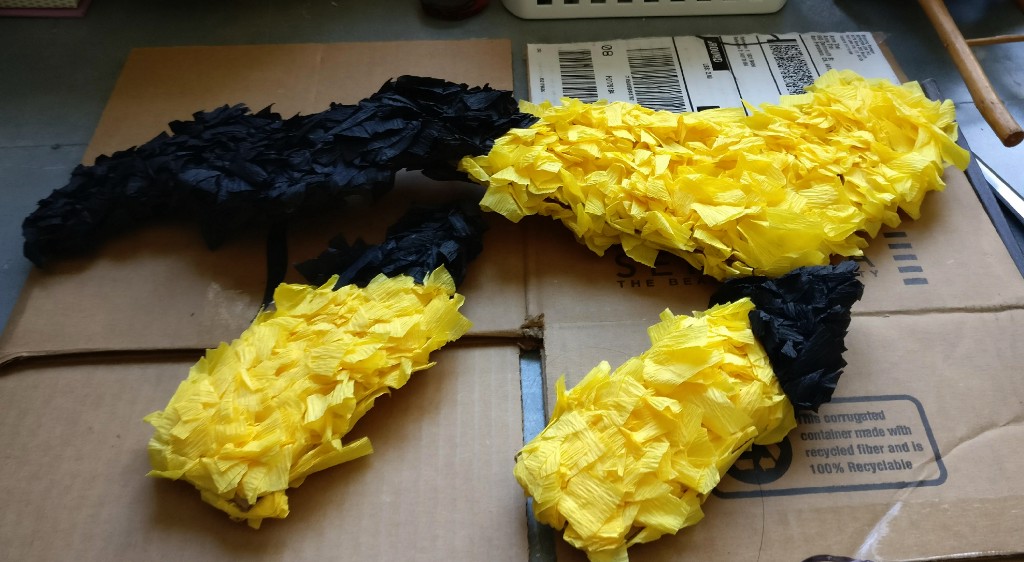
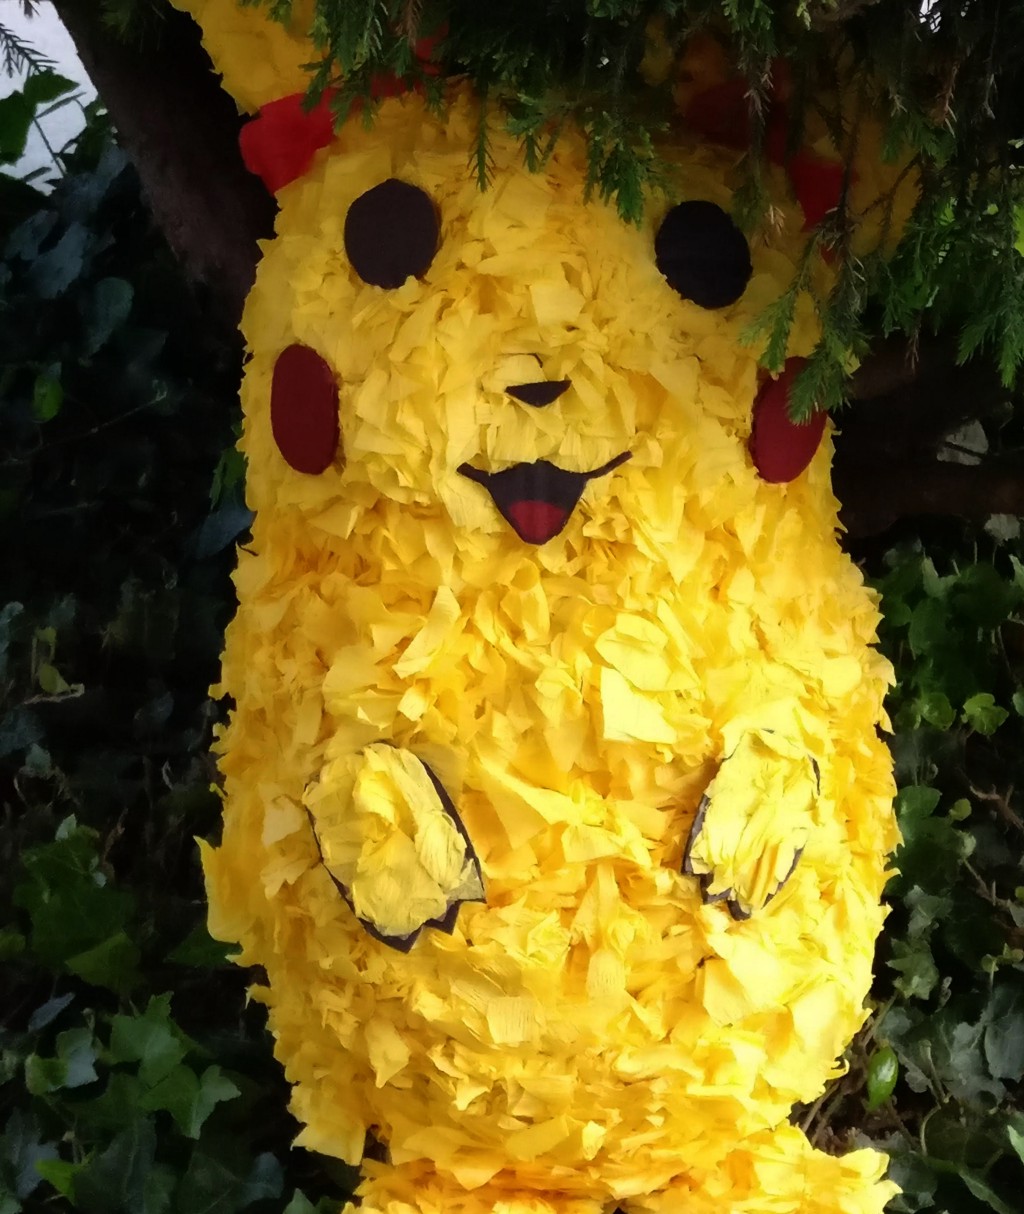
I drew the outline of the Pikachu ears, tail, eyes, nose, and mouth onto a cardboard box flaps. I cut them out and colored them with sharpie. For the tail and ears, I sticked on crepe papers to make them fluffy and match the Pikachu’s body.
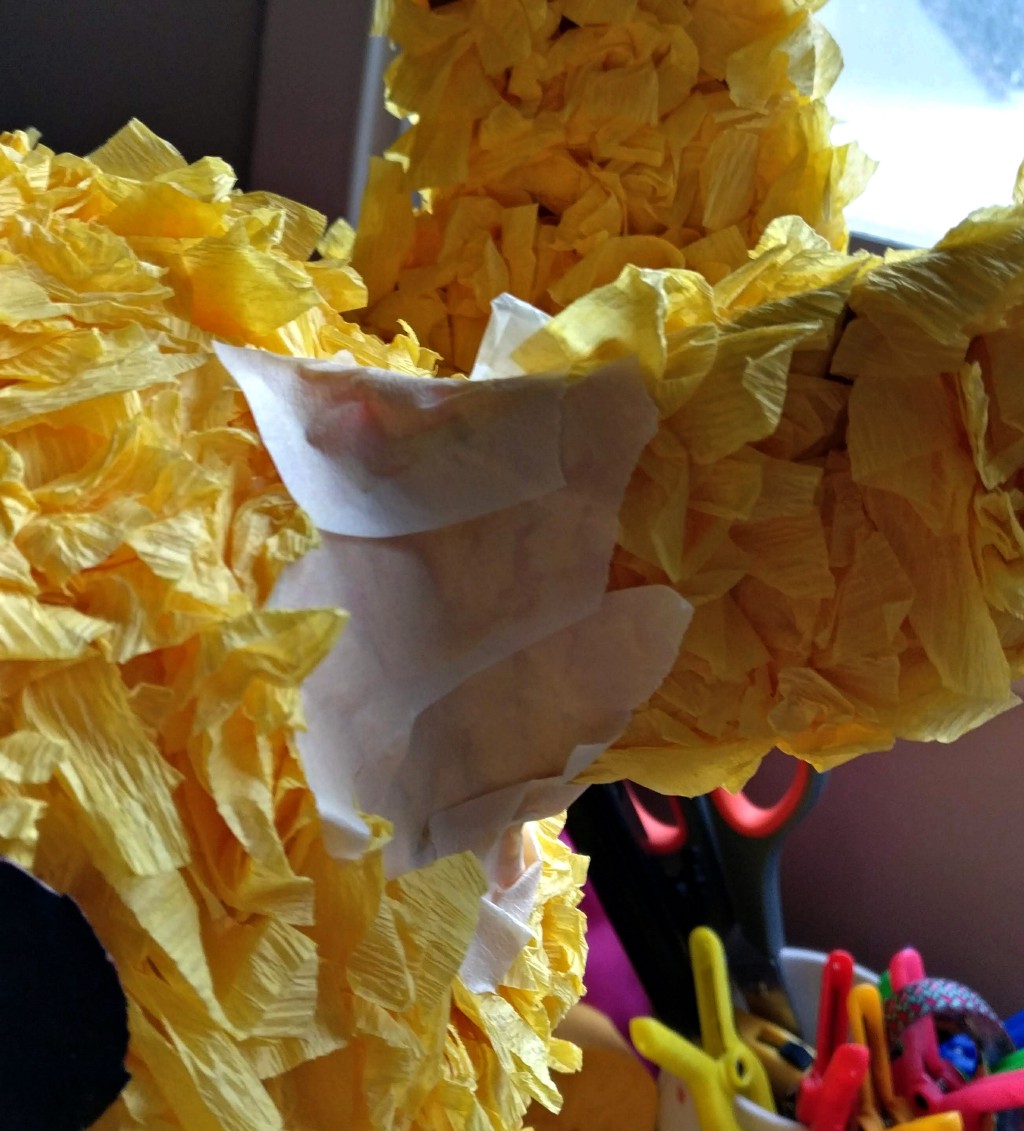
I glued all parts except for the tail in place with glue. For the tail, I glued only the bottom half to the Pikachu’s body, but then I realized it wasn’t as bending as Pikachu’s tail. It kept on falling backward.
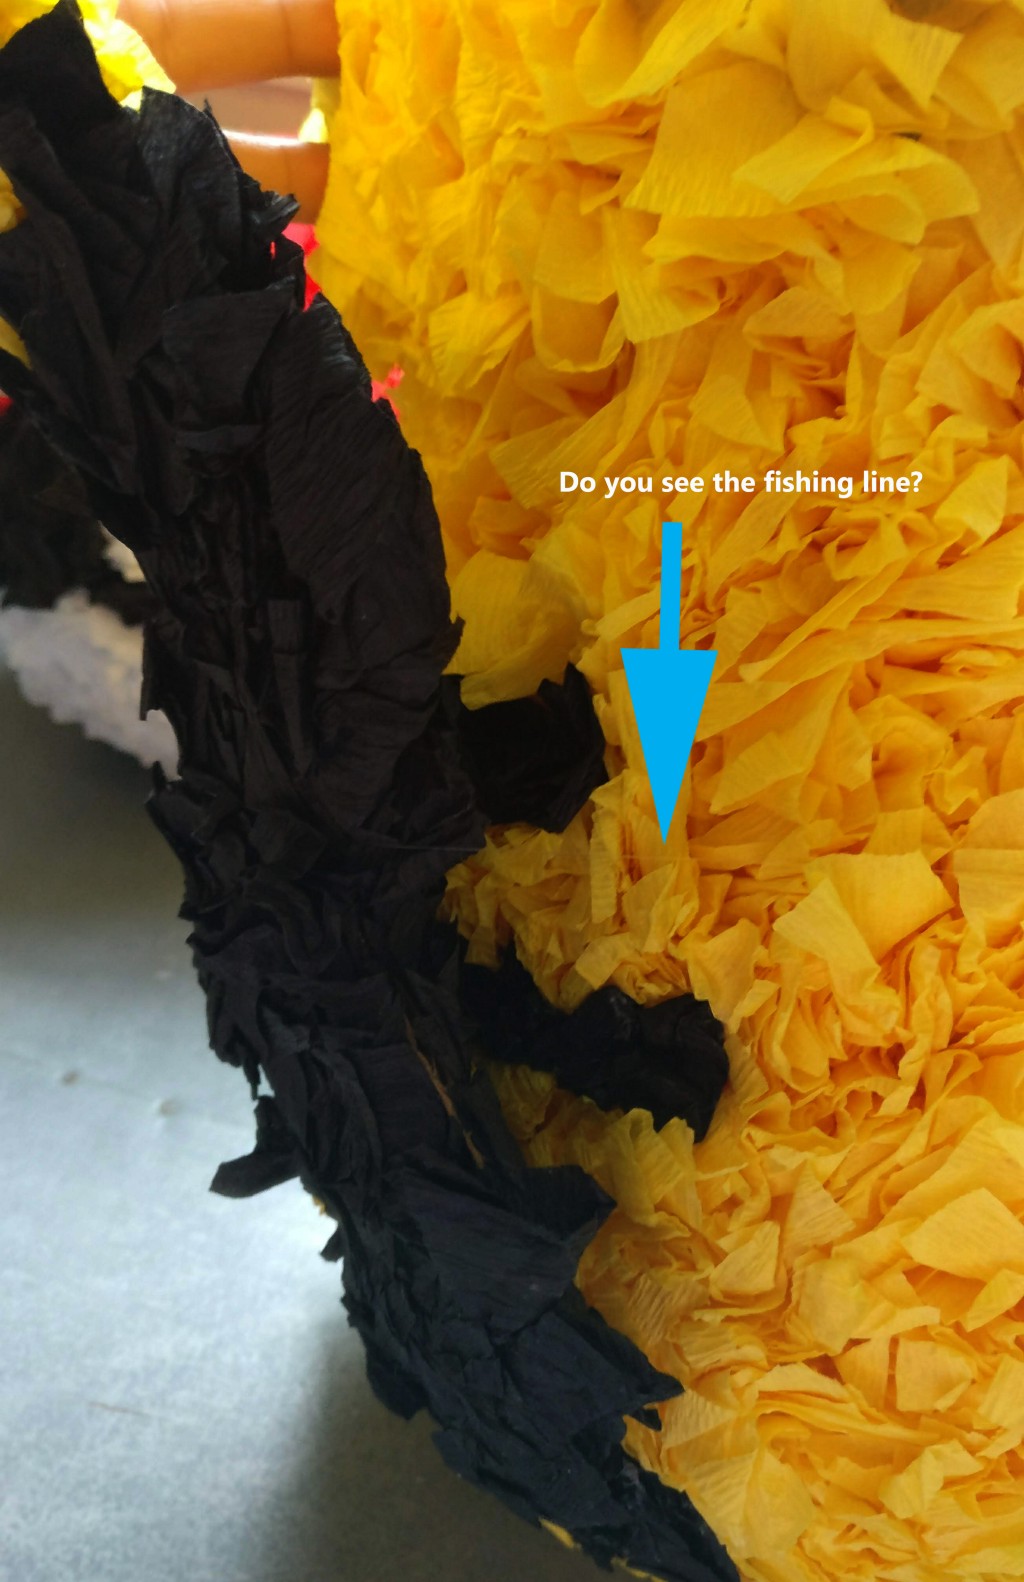
To solve this problem, I ran a fish line from the middle of the tail to the front of the Pikachu bottom. The fish line hold the tail in place and allowed movement flexibility.
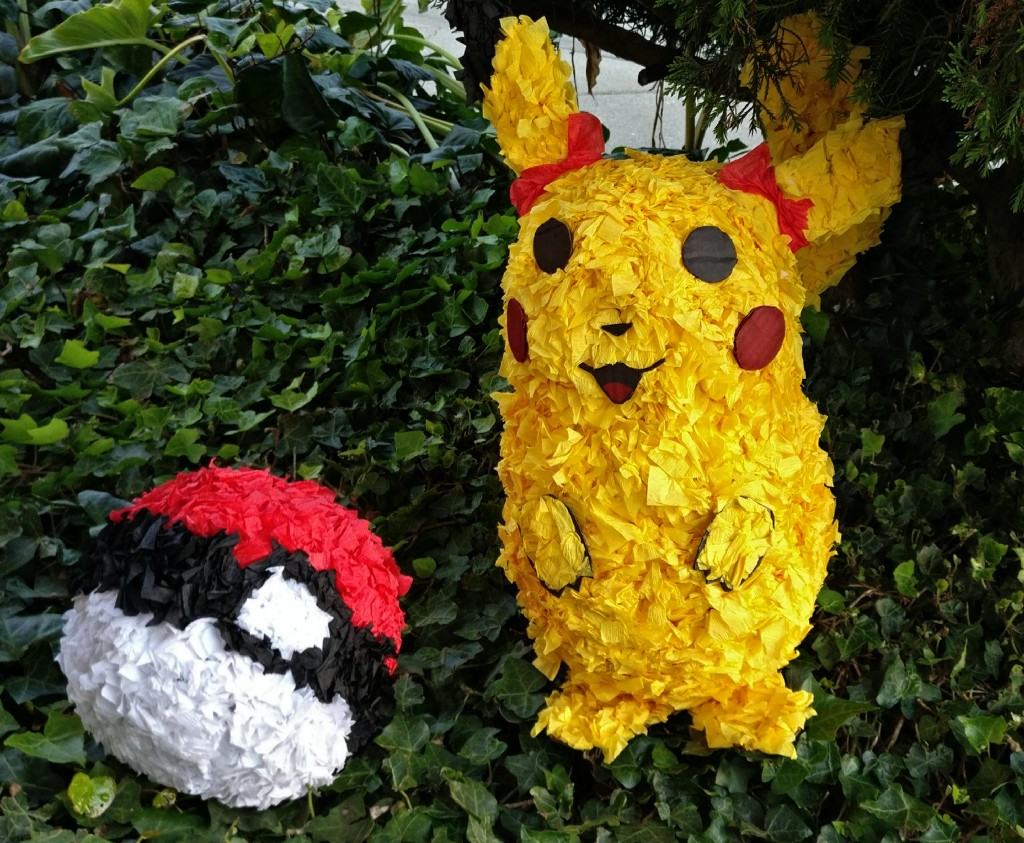
Final Product
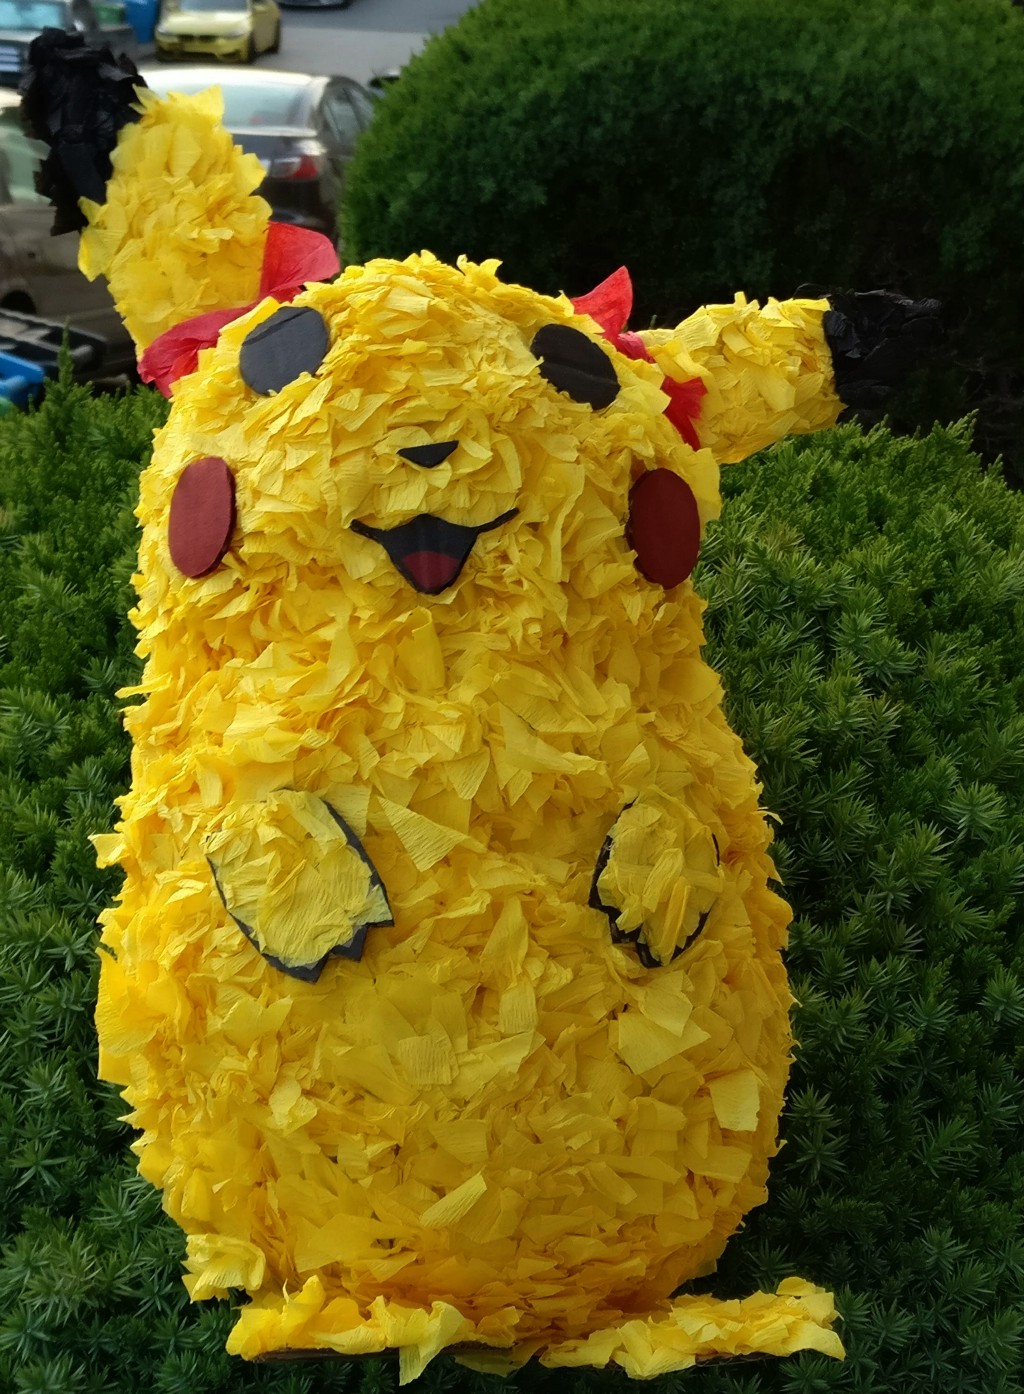
Here are the final products. They are super cute!
Tips/Failure Experiences
Conclusion
Overall, the Pikachu and pokeball pinatas turned out way better than I expected. They are so cute, it will break my heart to hit it with a softball bat.
Failures
I struggled a lot with attaching the Pikachu body parts to the Pikachu body. Make the Pikachu body parts attached it to the Pikachu with masking tape first before covering the whole Pikachu with crepe papers. That way, you can avoid the needs of using fish line.
Suggestion and Improvement Ideas
- For those hard corners or shapes, use thinner newspaper strips. The thinner the strip of newspaper is, the easier it is to shape the newspaper to the balloon shapes.
- Make sure the newspaper covered balloon is fully dried before popping the balloon. If not, when the balloon pops the newspaper cover will shrink with the balloon.
- Use a wooden pencil eraser end instead of chopstick. Either ones work.
- Coloring the Pikachu body parts was unnecessary. I did it incase I didn’t fully cover them with the crepe papers.
- Before glueing on the Pikachu’s body parts, make sure to lay them out first and see where each pieces should go. Once glue, it will not comes off.
- If you have a paper shredder, use it to shred the newspaper. 😉
References
- “Crêpe Paper.” Wikipedia, Wikimedia Foundation, 27 July 2018, en.wikipedia.org/wiki/Crêpe_paper.
- “Comparing Different Kinds of Crepe Paper.” Miss Petal & Bloom — Crepe Paper Flowers Handmade in Singapore, Miss Petal & Bloom — Crepe Paper Flowers Handmade in Singapore, 23 Dec. 2016, www.misspetalandbloom.com/single-post/2016/12/01/Comparing-different-kinds-of-Crepe-Paper.
Pokemon Piñata | Project #6 was originally published in ThriftedCrafts on Medium, where people are continuing the conversation by highlighting and responding to this story.